My degoogling journey: SearXNG

Ironically, what started me on my journey towards degoogling was ever since I got my hand-me-down Pixel 6 Pro a few years ago. I installed GrapheneOs on it. I also don't run Google Play Services on it. In the following months, I also stopped using Google as my primary search engine. I started using Duckduckgo, but I felt like it was not enough. I needed something that I can take ownership of. And this is where SearXNG comes into the picture.
SearXNG is a metasearch engine, which means it aggregates results from a couple hundreds of different search engines. And the best part is it does it whilst ensuring user privacy by not tracking and profiling users. The way SearXNG works is it strips out personal data before they are sent to search engines, which means no user information are sent to third party services like nasty advertisers. Basically, each search request is processed with a unique, randomised browser profile for every request. This is very different to how Google operates where it builds a profile of your likes, dislikes, what wanna you shop, where you wanna eat etc.
SearXNG is easy to install. While there are heaps of public instances out there, I chose to self host mainly because of trust. Secondary is by running my own instance, I can modify the settings for whatever the hell I want. I installed SearXNG on our NAS. If you go back to my older posts, you'll know that I also installed Pihole and Wireguard.
My current set up works for me. I VPN to home via Wireguard and get the benefit of Pihole and everything else including Calibre-Web 😺 This not-really-a-tutorial assumes that you have Docker installed in your server or local computer.
Step 1: Clone the SearXNG repo
git clone https://github.com/searxng/searxng-docker.git
Step 2: Change your directory
cd searxng-docker
If you're using VScode, you can open the searxng-docker folder. Here you will see a folder called searxng, .env and docker-compose.yaml amongst many other files. These are just the things you need to edit for your instance to work.
Step 3: Edit settings.yml
In the searxng folder, you will see a file called settings.yml. You'll see here that it says that you need to change the secret_key. You can do it by running the following command in your terminal:
sed -i "s|ultrasecretkey|$(openssl rand -hex 32)|g" searxng/settings.yml
Step 4: Edit .env file
Now, go back to the main searxng-docker folder. You now need to edit the .env file. Almost everything written in this file is commented. But the most important things for you to change are these two:
SEARXNG_HOSTNAME
LETSENCRYPT_EMAIL
SEARXNG_HOSTNAME should be set to the IP address or hostname where your SearXNG instance can be accessed. Since I am running it locally and dont want it exposed outside, I am using the internal IP of the NAS here. You don't need to put https:// before the IP address. If you want exposed to the Internet, then you should use a domain name. Then you'll need to ensure that the domain is properly directed to the server's IP address.This setting is protocol-agnostic, which means it's used just to identify the network endpoint. Basically, you're just telling it this is the hostname. I dont care how you want to access it (https vs http). Whether your connection uses HTTP or HTTPS is determined by Caddy.
LETSENCRYPT_EMAIL is mainly used for generating a free SSL/TLS certificate from Let's Encrypt.
Step 5: Uncomment cap_drop ins searxng container
Let's go back to the main searxng-docker folder and edit the docker-compose.yaml. Scroll down until you see the section that says
searxng:
    container_name: searxng
    image: docker.io/searxng/searxng:latest
    restart: unless-stopped
    networks:
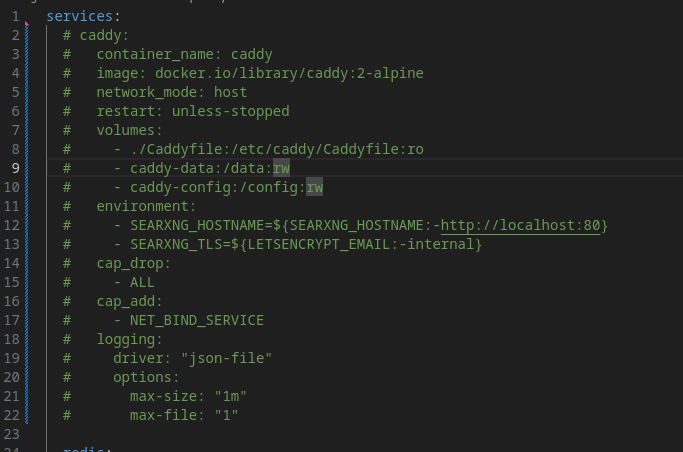
Scroll further until you find the configuration options cap_drop. You need to comment this out including the value ALL.
The cap_drop is a security setting that removes all special permissions from a container, making it more secure. It limits the privileges of the processes running inside the container. Removing this will pave the way for the creation of uwsgi.ini file.
Step 6: Run the container
docker compose up
This will create the uwsgi.ini file in the searxng folder. Now, go back to docker-compose.yaml and uncomment the cap_drop that you commented a while ago.
Run the docker compose up command again. This time, you can also use the -d flag in the command docker-compose up -d for detached mode.
**
Everything below is OPTIONAL. Go to step 13 if you don't need a cert
**
You can stop now here and just go to the IP address you put in the SEARXNG_HOSTNAME and just browse away. But you will see that it the website says that it is not secure. This can be very annoying especially as it will keep on asking you to ACCEPT RISK AND CONTINUE.
I don't want to do that all the time, so I generated my own certificates using mkcert. First step here is remove/comment out the caddy parts from the docker-compose file.

Then install nginx as reverse proxy.
sudo apt install nginx
Step 8: Mkcert
We will go back to nginx in a bit. But for easier flow. Let's install mkcert first. mkcert is a simple tool for making locally-trusted development certificates.
Run the following commands to install it:
sudo apt install libnss3-tools (if you're running Debian)
This will install all the dependencies you need for the mkcert. Run the following commands to install mkcert. You can also use homebrew or build it from source. You can find all these in the mkcert repo on github.
curl -JLO "https://dl.filippo.io/mkcert/latest?for=linux/amd64"
chmod +x mkcert-v*-linux-amd64
sudo cp mkcert-v*-linux-amd64 /usr/local/bin/mkcert
Check if it's installed by running mkcert --version
Step 8: mkcert configuration
Run the command mkcert -install to set up a system that allows you to create and use trusted certificates on your local computer. So basically, it creates a certificate authority (CA), adds the CA to your trusted list and then generate certificates for things like localhost or custom domains you use for testing. This is what removes that "untrusted certificates" thingies on firefox or whatever browser you're using. (Don't use chrome tho)
Step 9: mkcert for the site
Now, you can run mkcert yourdomain.org to create a self-signed certificate and its private key for your domain. It will create two files yourdomain.org.pem and yourdomain.org-key.pem. The first one is THE certificate file. It has all information needed to secure the connection (like encryption details) and proves the website's identity. The one with the -key is the private key file, which is used by the server to decrypt data sent by users. Keep this private key safe!
This will be saved in the directory you ran the mkcert yourdomain.org command.
Step 10: Tweak the nginx again
Now, it's time to create the Nginx configuration file for the searx instance. For this, you can run the command sudo nano /etc/nginx/sites-available/searxng.
Paste the following configuration.
server {
    listen 80;
    server_name searx.example.com; # Replace this with your domain/IP
    return 301 https://$host$request_uri;
}

server {
    listen 443 ssl;
    server_name searx.example.com; # Replace this with your domain/IP

    ssl_certificate_key /path/to/yourdomain-key.pem;
    ssl_certificate /path/to/yourdomain.net.pem;
    #again change these two for your own path and filenames

    location / {
        proxy_pass http://127.0.0.1:8080;
        proxy_set_header Host $host;
Step 11: Look for rootCA.pem
rootCA.pem is the master key, which acts like a trusted authority that can "sign" other certificates to make them valid. You only need one root CA for all the certificates you create. The certs you created awhile ago are called child certificates created by this rootCA which is like their cool mum. Now, we want to find where that mum is:
cd $(mkcert -CAROOT)
Run ls to list all the files in that folder. You're meant to see two files here. You only need the rootCA.pem. Type sudo nano rootCA.pem or code rootCA.pem (if you're using VScode). Copy the contents of it and open a new notepad in your local device (not within your NAS). Paste the key there and save it as rootCA.pem.
Step 12: Make your browser trust it
On Firefox, type about:preferences on the address bar. You will be directed to the settings page. You can click the Privacy & Security tab from the side bar and scroll down until you see the certificates part. Click view certificates where it will open a new window. From here, click the Authorities tab and then import the rootCA.pem you created locally. You have to do this for EVERY device and browser that you want this configuration on.
Step 13: Use SearXNG
Now go to the searxng instance you created and it should now say connection secure
Step 14: Fine tune your preferences

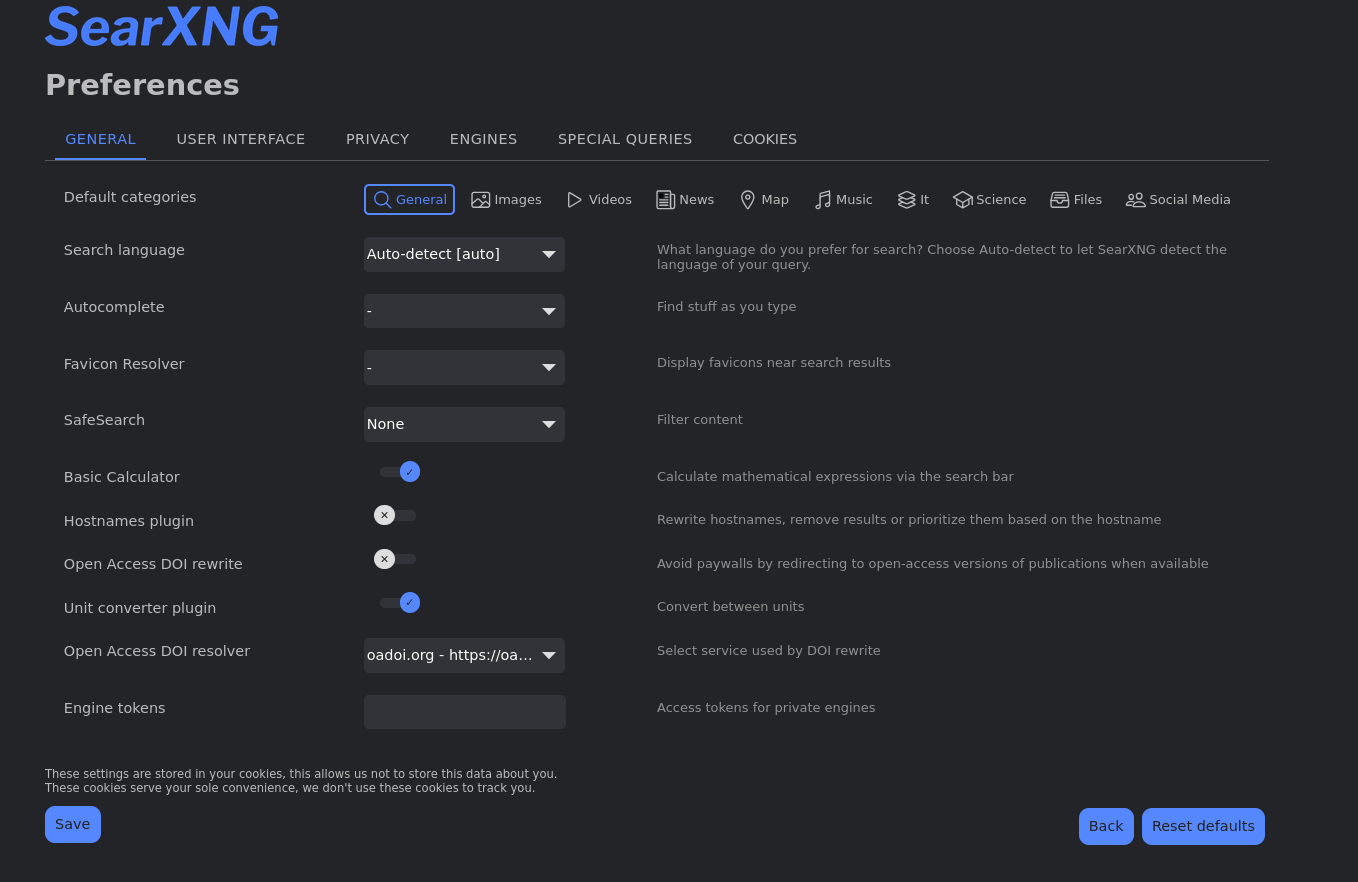
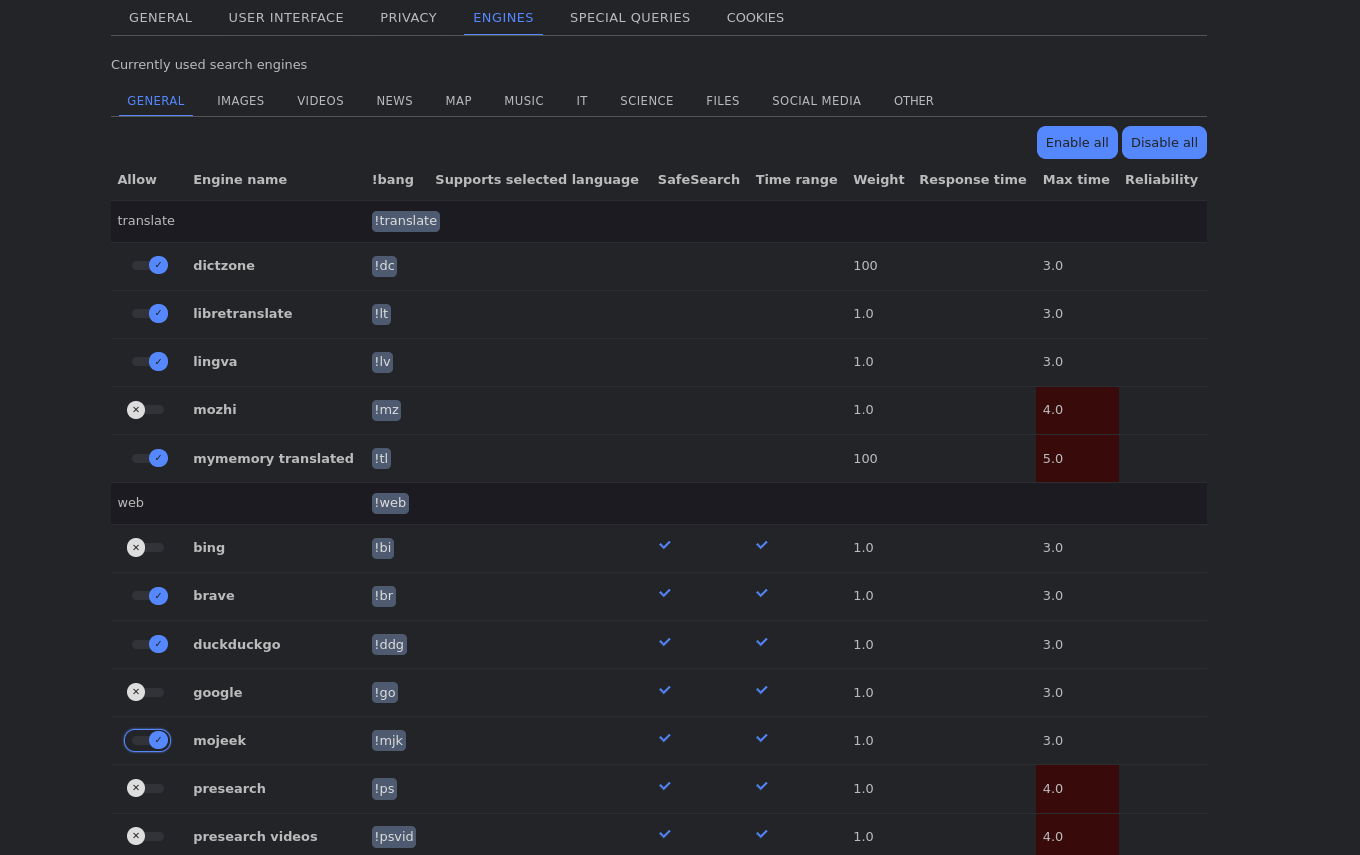
In the top-right corner of the landing page, you'll find preferences. This is where you can customise various settings like your preferred language for the interface. What excited me the most is the Engines tab where I could select or disable different search engines across a wide range of categories. This means I've got a full control over where my search results are sourced from!

There are more to talk about, but I'll stop here. You can read more stuff about SearXNG on their github page. If you're planning to make your instance publicly facing, the github page mentioned the use of Gluetun and Authelia.
Ciao for now