VPN to your home network with Wireguard
In the last two blogs, I talked about how I installed pihole and unbound. This will be third part in the series, if I could call it that. This one solely focuses on Wireguard. I set it up so I can access our homelab and get the benefits of pihole and unbound even though I am not connected to our home network. I installed Wireguard using wg-easy.And as you can deduce from the name, installing it was indeed easy and breezy.
I deployed wg-easy on a virtual machine running Debian, which is hosted on TrueNAS. I won’t go into the details on how to create the VM, but you can create one on the Virtualisation tab. Click ADD and fill out everything. Once you reach the Installation Media section, you will be asked for the image. Since I used Debian, the image can be found here. I will write another more detailed documentation for this. But we’ll talk about wg-easy for now. While I installed it via VM, its not a requirement.
STEP 1: Install Docker
curl -sSL https://get.docker.com | sh
sudo usermod -aG docker $(whoami)
The second command adds your user to the Docker group.
STEP 2: Create a Password Hash
Wgeasy has explained well how to create a bcrypt hash. You can generate a bcrypt pw using the following command. Take note, don’t just copy the command below. You need to replace the password with your own password.Once you've changed 'YOUR PASSWORD' to a password of your liking, paste the command in the terminal, and bcrypt will generate the hash for you.
docker run --rm -it ghcr.io/wg-easy/wg-easy wgpw 'YOUR_PASSWORD'
PASSWORD_HASH='$2b$12$coPqCsPtcFO.Ab99xylBNOW4.Iu7OOA2/ZIboHN6/oyxca3MWo7fW' // YOUR_PASSWORD```
The output will give you a series of PULL COMPLETE. In the end, you'll see a variable called PASSWORD_HASH that you will need later.
STEP 3: Docker compose
You can pull the wg-easy image here via docker pull ghcr.io/wg-easy/wg-easy, but I decided to do it via docker compose. I started by creating a directory called wgeasy
mkdir wgeasy
I cd wgeasy to change directory followed by nano docker-compose.yml. This creates the docker-compose.yml file which you need to populate with the following:
version: "3.8"

services:
  wg-easy:
    image: ghcr.io/wg-easy/wg-easy
    container_name: wg-easy
    environment:
      - WG_HOST=the-IP-you-used-in-the-docker-compose
      - PASSWORD_HASH=the-hash-you-got-awhile-ago
      # - WG_PORT=51820
      # - WG_DEFAULT_ADDRESS=10.8.0.x
    volumes:
      - .:/etc/wireguard
    ports:
      - "51820:51820/udp"
      - "51821:51821/tcp"
    cap_add:
      - NET_ADMIN
      - SYS_MODULE
    sysctls:
      - net.ipv4.ip_forward=1
      - net.ipv4.conf.all.src_valid_mark=1
    restart: unless-stopped ```
Save the file by Shift + X followed by pressing Y. Run the command docker compose up -d. The -d stands for detached mode. -d is is crucial for running services or applications that need to stay operational in the background.
STEP 4: Wireguard Web Gui
Once finished, sign into the Wireguard Web Gui which can be found on http://the-IP-you-used-in-the-docker-compose:51821/. The password they’re asking here is the password matching the hash that you put in PASSWORD_HASH. Once in, you can select + New. In the newly created client, you’ll find a symbol for a QR code.

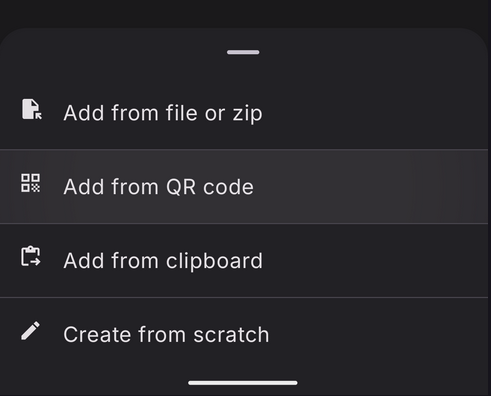
For phones: You can scan that QR code using the Wireguard app in your phone. For some reasons, the official Wireguard app does not seem to work with my Graphene phone. And it looks like I am not the only one with the same problem. I used WG Tunnel instead, which was available through f-droid. From the app, click the + sign → Add from QR code → scan QR code

For laptops or other devices: Take note, my laptop is running on Fedora. Go to Wireguard Web GUI, download the .conf file using the download button next to the QR code picture (see pic above). Copy the downloaded file to the laptop you will be using outside of your home network. cd to where you put the .conf file. Then, run the following code
nmcli connection import type wireguard file xxxx.conf
CRUCIAL: Delete the .conf file after.
For both your phone and laptop, make sure you use the IP address of the pihole so that when you connect to Wireguard, you also get the benefit of pihole. Using the phone app, you can edit the tunnel by holding the client name until it shows the gear button. For the laptop, go to
Settings→ Network → VPN gear icon → Ipv4 tab → DNS
Replace 1.1.1.1 with your pihole ip address.
And that’s it.
Plaudite.